#10: Winter Sowing Part 2
See the method I used to cold stratify some shade-loving native wildflower seeds in the fridge using stratification sand and sandwich bags.

As I started putting together my plan for spring, I realized that I was going to need a lot more shade plants than what I already had sowing outside. Panicked at the thought of the cost of buying them all as plugs, I returned to Prairie Moon Nursery to get some more seeds.
The problem is that there's not quite enough winter left for me to sow them outside like I did last time. The weather is very unpredictable here in Southern Indiana — it might snow in May, or it might get up to 70 in March and stay there — so I wasn't super confident that there would be 60 days of cold between now and when the weather warms up for my seeds to actually germinate.
So I decided to try a different approach this time, one that doesn't depend on the weather being consistent. I'm going to use the main method Prairie Moon Nursery recommends: cold stratification in the refrigerator using stratification sand.
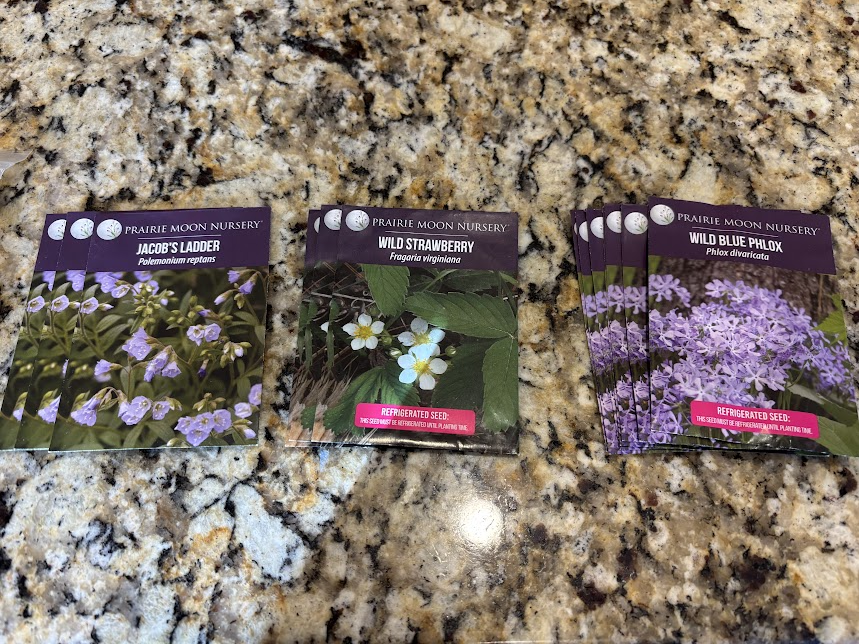
I bought seeds for three different shade-loving plants: Jacob's Ladder (Polemonium Reptans), Wild Strawberry (Fragaria Virginiana), and Wild Blue Phlox (Phlox Divaricata), as well as a pound of stratification sand (which Prairie Moon Nursery also sells). Here's the process they recommended that I followed.
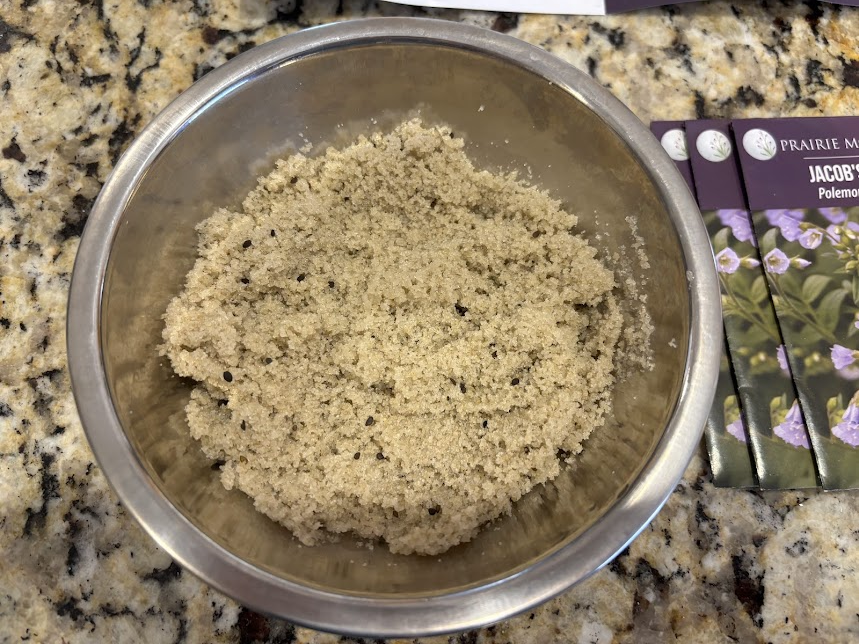
First, you put 1/3 of a cup of sand into a bowl for every 1/8 of an ounce of seeds you're stratifying. I didn't have anywhere near 1/8 of an ounce of seed for any of the three plants I bought seeds for, but I didn't want to do the math to try and figure out exactly how much sand I needed, so I just went with a third of a cup of sand for all three of my seeds. I had just enough for three stratification bags from the pound of sand I bought.
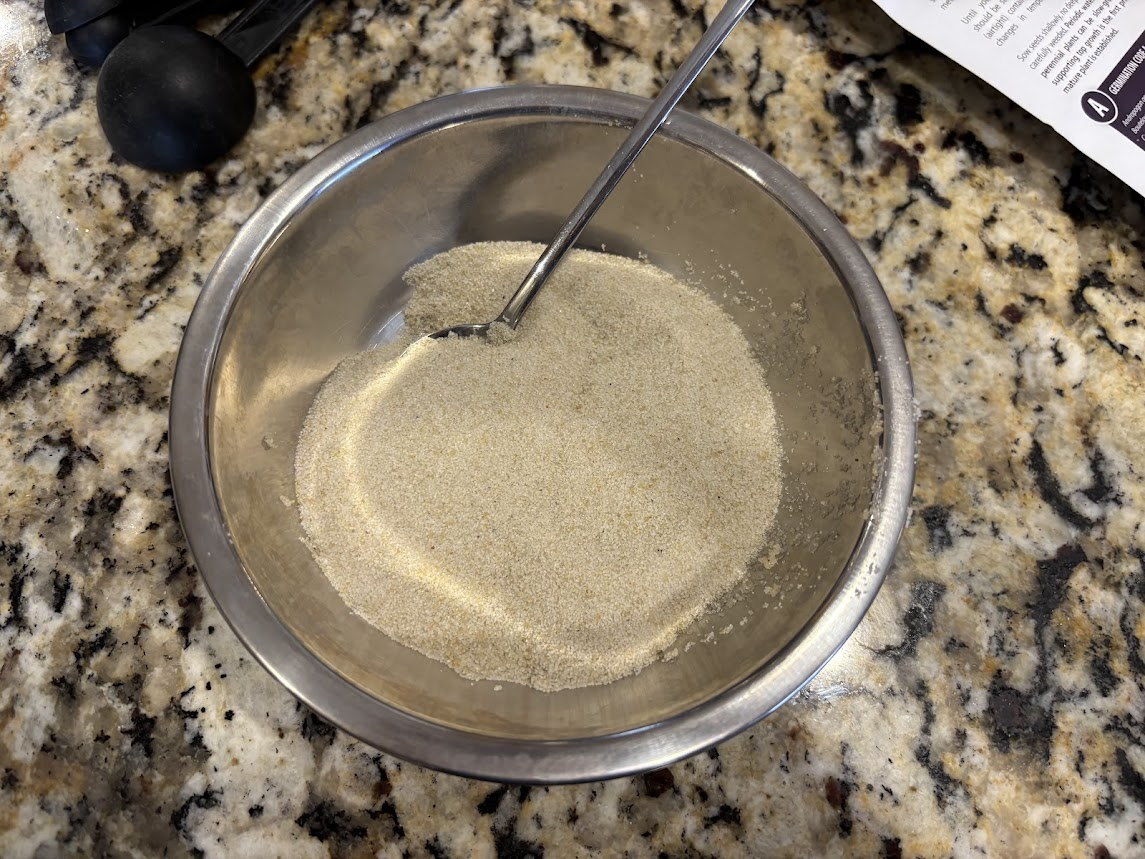
Next, you put a small amount of water in to get the sand wet (because cold stratification requires a cold and wet medium — not just cold). Prairie Moon Nursery recommended 1-2 teaspoons of water for each 1/3 cup of sand. I ended up needing two teaspoons of water each time.
Once you put the water in, stir it up in the sand to spread the moisture throughout the sand.
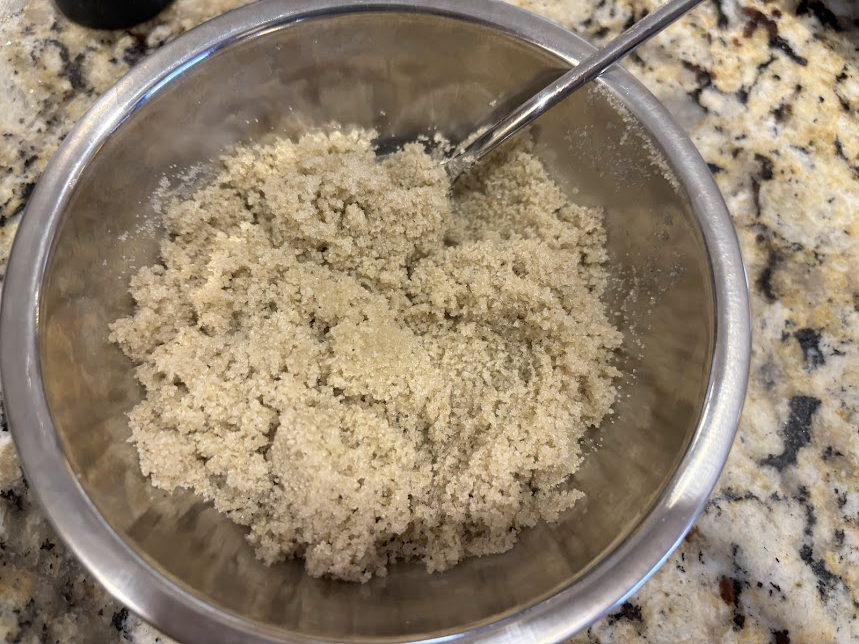
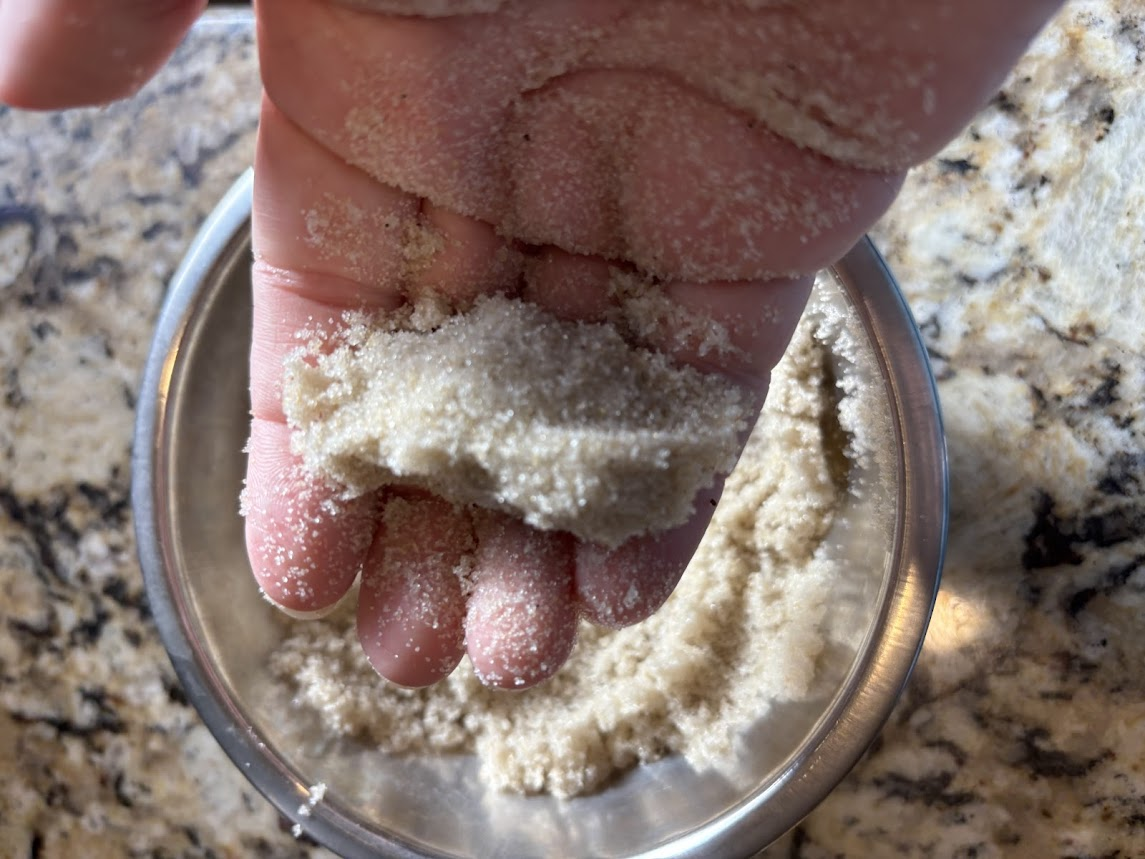
Put the water in slowly and incrementally. I found it was easier to mix up when I put less water in at a time, and you also don't want to end up with too much water in it because that can rot your seeds or cause mold to grow. Prairie Moon Nursery says that you want just enough water to be able to form the sand into a ball.
Once you have wet sand, you can sprinkle in your seeds. Make sure you get all of them out of the package. Some like to hide in the corners, so I ended up having to open both the top and bottom of the packages for most of my seed envelopes.
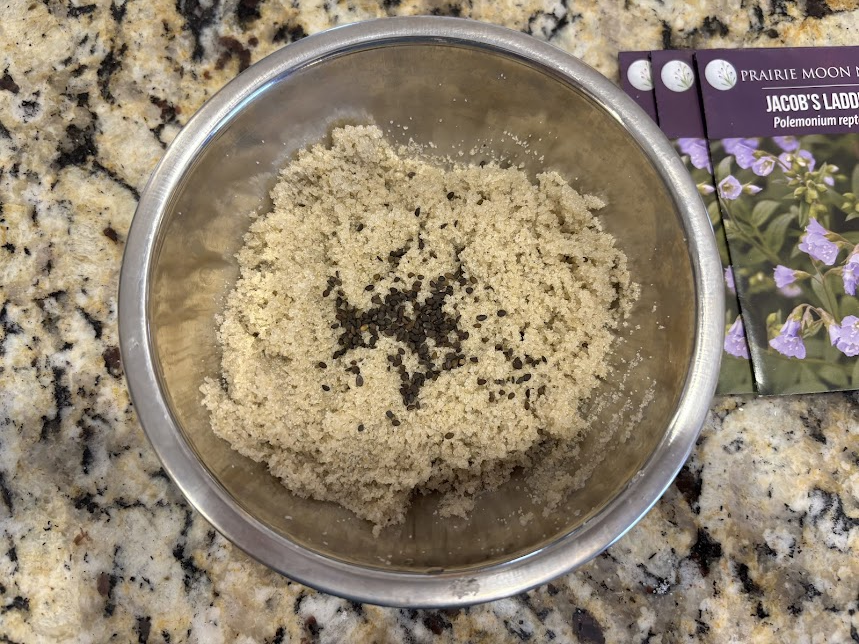
After you have all of your seeds in the sand, stir it up (I used a teaspoon) to mix the sand and seeds together.
Once that's done, put the mixture into a plastic bag (I used Ziploc sandwich bags I already had in the pantry) with the name of the plant written on it. Pro tip: fold the top half of the bag down to make it easier to get the mixture in without spilling it. This was much easier for me than trying to dump it in through the zip-able opening. Otherwise, you risk spilling sand everywhere (which is messy) and losing seeds in the process (which is sad).
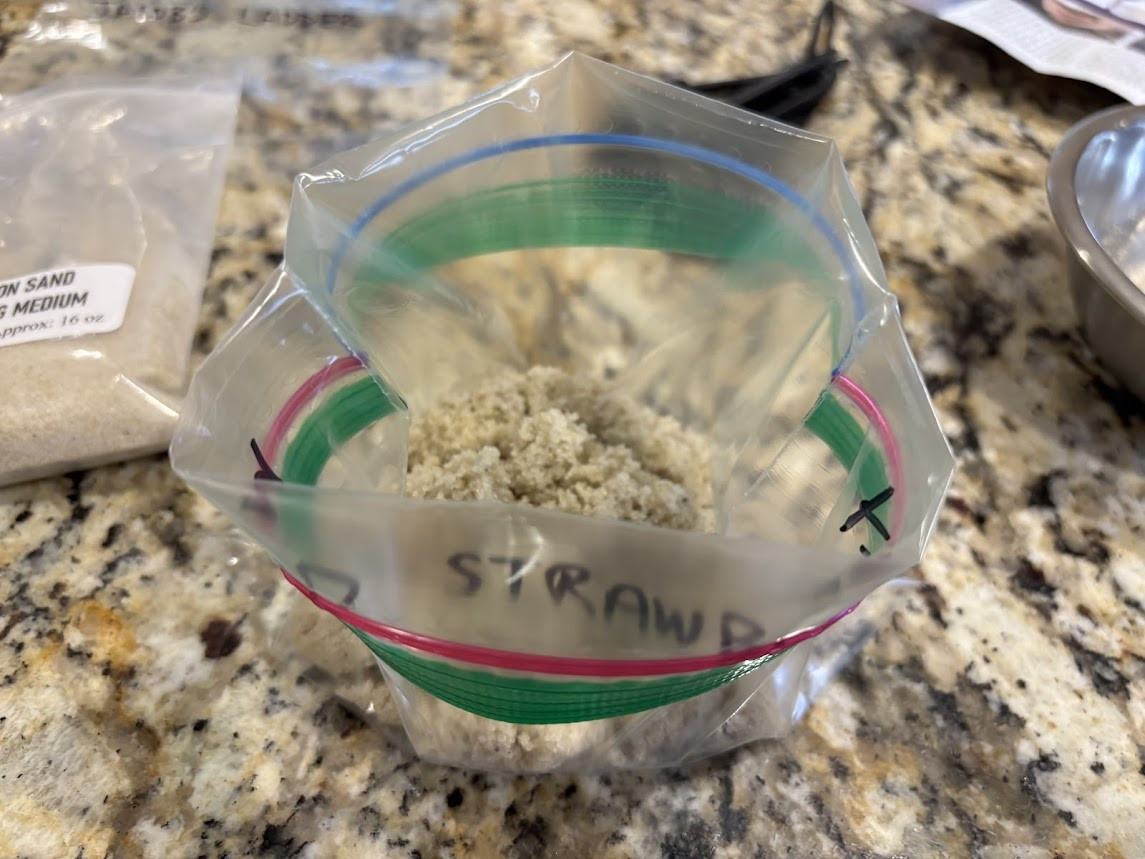
Finally, I pushed all of the air out of the bag, folded it up neatly, and placed it into the larger, thicker plastic bag that my sand from Prairie Moon Nursery came in. You don't have to do that last part — you could just put the individual bags into the fridge or place them all in some other container. I just felt like this was the best way to minimize how much space they'd need in the fridge and keep them protected from other things in the fridge dripping on them or tearing the bags.
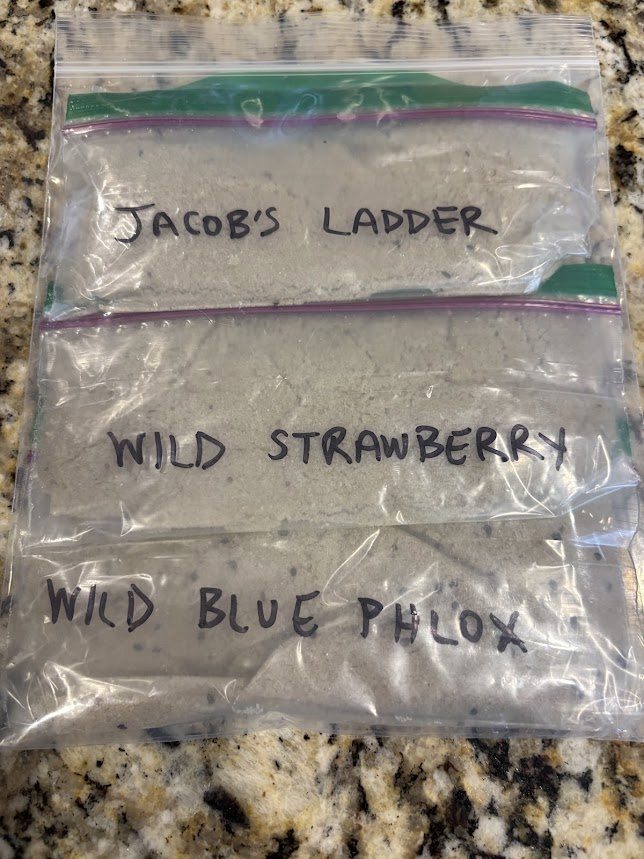
After that, you just stick them in the refrigerator for however many days of cold stratification that they need (mine were all intentionally 60 for simplicity's sake). You are supposed to check them occasionally to see if they need more water, so I created a calendar reminder to check them once a week. I also created a calendar reminder to take them out and get them in dirt after 60 days have passed.
This is another "we'll see how it goes" attempt at winter sowing, so again, I would maybe wait to see the outcome (make sure to subscribe!) in a few months before you use this method. In all likelihood, since I'm getting to this so late in the season, these probably won't be ready to put into the ground until fall, but if it works out, it will definitely save me money on plugs (even though it's not as immediately gratifying as plunking a plug into the ground).
I also ended up being excited about trying a different method for winter sowing since I can't help but be pessimistic about my ability to grow plants from seed. I think next year I'll try lots of different methods (especially if the two I've tried this year don't work out) to see which ends up being the most effective of all.
Next Post: